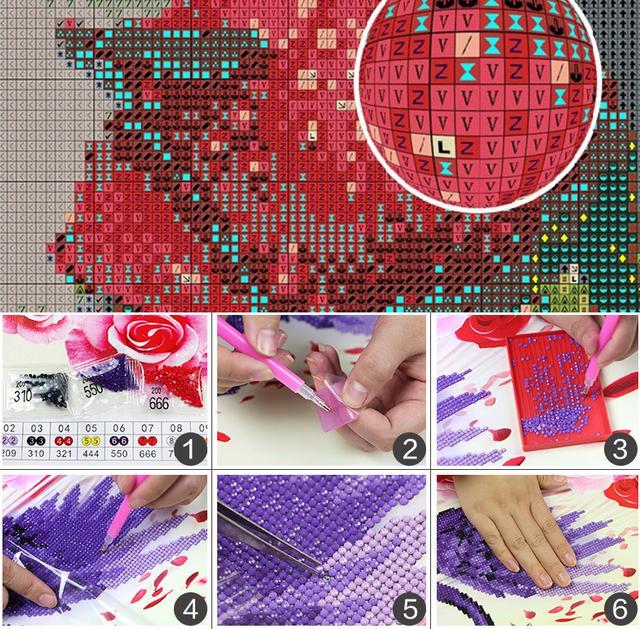
DIY Diamond painting production steps: 1. Open the box and check the diamond draw special tools. 2. View the resin diamond color, arranged in order of coding. 3. As shown. Uncover tape drawing above, you will see a lot of symbols corresponding to the color coding. 4. As shown. According to the corresponding color coded clamp the corresponding the resin inlaid diamonds. 5. Suggested that one type of the resin diamond one set completed faster. 6. In order to create a perfect diamond painting, drawings put together in one place every row symbols do not have to stay stuck diamonds. 7. To cut a good figure on the drawings hold sorted array mounted to the plane of the material above. 8. Splices need flat against the neat, do not have cracks. 9. After a good fight, the rest of the gap at the glue corresponding symbols of diamonds.
Notes: 1. This is DIY diamond painting. It's not finished. You need to finish it yourself. 2. Please allow 1-3cm measuring deviation due to manual measurement. 3. Due to the different monitor and light effect, the actual color of the item might be slightly different from the color showed on the pictures. Thank you!
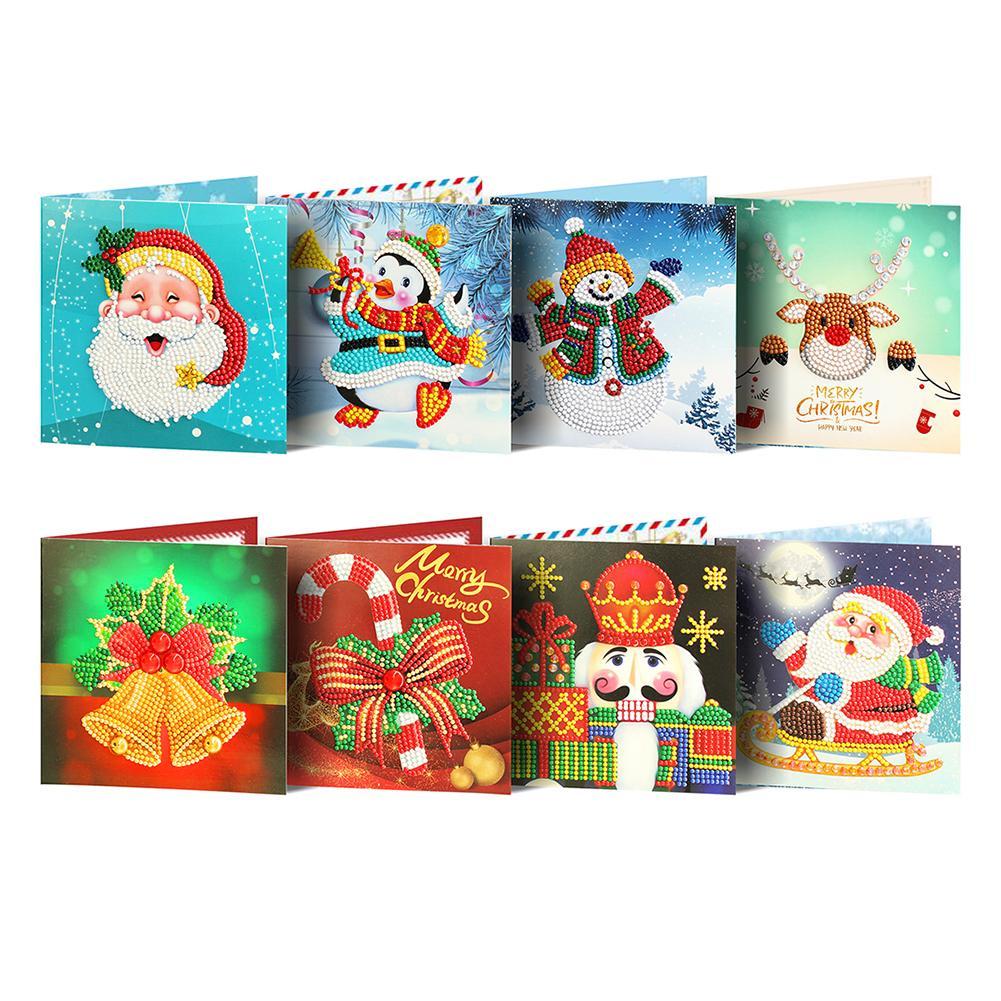
Package Content:
8 X Diamond Cardboards
8 X Greeting Cards Envelopes
1 Set x Diamond Drawing Tool (Jelly Gule, Drill Pen, Speed Up Plate, Drill Pack)
DIAMOND PAINTING INSTRUCTIONS
Remove all items from the package
Lay out the canvas on a clean, flat surface
Choose a single color diamond to get started with
Place the diamonds in the included grooved tray for easy picking
Dip the tip of the applicator in the wax. This will help you pick up the diamonds.
Note: some kits come with wax. Others come with tweezers - your choice!
Press the tip of the applicator tool on the rounded side of the diamond
Peel back the plastic film and carefully press the diamond onto its corresponding symbol