8pcs Diamond Painting Greeting Thanks Cards Special-shaped Drill
1/7
8pcs Diamond Painting Greeting Thanks Cards Special-shaped Drill
1/7

8pcs Diamond Painting Greeting Thanks Cards Special-shaped Drill

$19.99
$19.99
Save 0%
4 sold
Quantity
Free worldwide shipping(Order Over $90)
Free returns
Factory direct sales
Secure payments
SKU: 639079.01
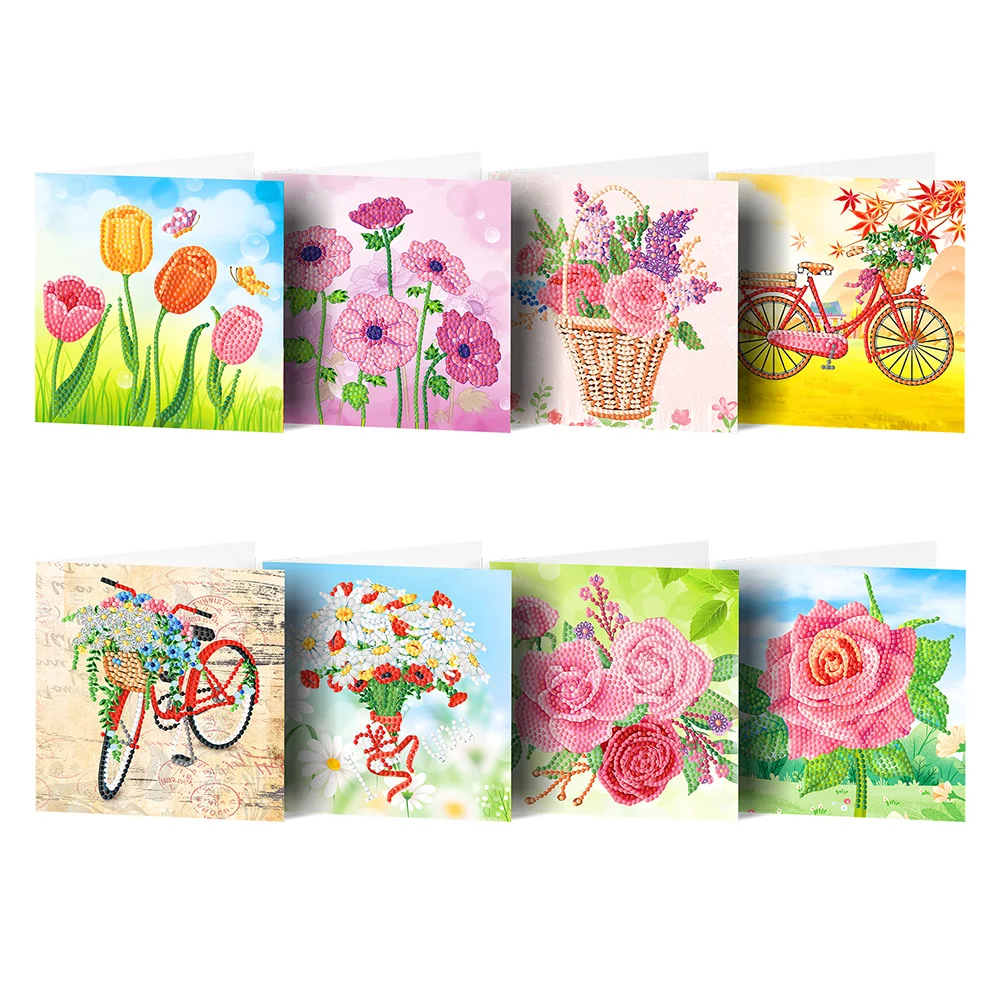
8pcs Diamond Painting Greeting Cards Set Special-shaped Partial Drill Mosaic Thanks Birthday Postcards 5D DIY Festival Folding Greet Cards Gift
Specification: 
Item: DIY Diamond Painting card
Material: high quality partial special-shaped drill + card paper 
Size: 15x15cm/5.91x5.91in (after card is folded in half)
Weight: 300g
Package size: 30x15x3cm/11.81x5.91x1.18in

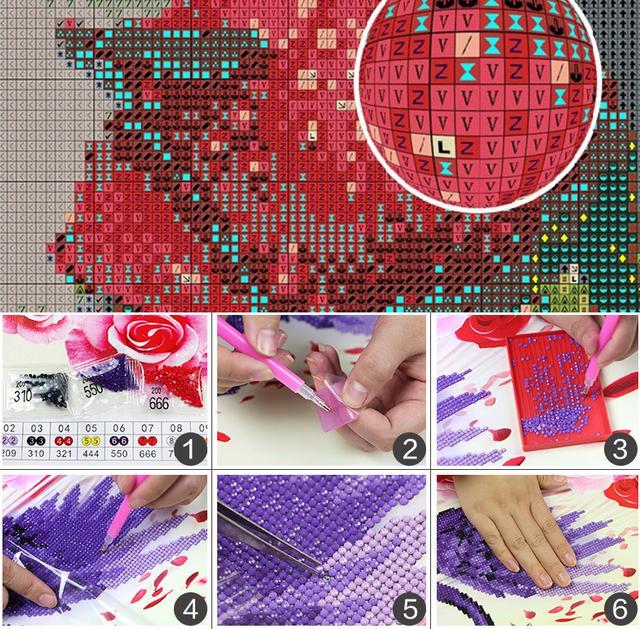
DIY Diamond Painting steps:
1. Open the packing box and check the special tools for Diamond Painting
2. Check the color of resin diamond and arrange it in coding order
3. Uncover the tape above and you will see many symbols corresponding to color coding
4. Inlay diamonds with resin according to the corresponding color coding fixture
5. It is suggested that a set of resin diamonds can be completed faster
6. In order to make a perfect Diamond Painting, put the drawing in one place, and there is no need to leave diamonds in each line of symbols
7. To cut a good FIGURE on the drawing, please install the classification array on the plane of the above material
8. The splicing shall be flat, neat and free of cracks
9. After a good struggle, the remaining glue gaps meet the diamond symbol

Note:
This is a diy diamond point diamond product, it is not completed, you need to complete it yourself. 
Due to the different monitor and light effect, the actual color of the item might be slightly different from the color showed on the pictures. Thank you!
Please allow 1-2cm measuring deviation due to manual measurement.

8 * Diamond Cardboards 
8 * Greeting Card Envelopes
 
1 set * Diamond Drawing Tools (point drill pen, speed-up plate, drill bag)

DIAMOND PAINTING INSTRUCTIONS

  1. Remove all items from the package

  2. Lay out the canvas on a clean, flat surface 

  3. Choose a single color diamond to get started with 

  4. Place the diamonds in the included grooved tray for easy picking 

  5. Dip the tip of the applicator in the wax. This will help you pick up the diamonds.

    1. Note: some kits come with wax. Others come with tweezers - your choice!

  6. Press the tip of the applicator tool on the rounded side of the diamond

  7. Peel back the plastic film and carefully press the diamond onto its corresponding symbol

  8. Repeat the process until you're done!